Buffalo LinkStation Live Manual do Utilizador
Consulte online ou descarregue Manual do Utilizador para Servidores NAS e de armazenamento Buffalo LinkStation Live. Buffalo LinkStation Live User manual Manual do Utilizador
- Página / 63
- Índice
- RESOLUÇÃO DE PROBLEMAS
- MARCADORES
- User Manual 1
- Introduction 2
- Table of Contents 3
- Front Panel Layout 4
- Power Switch 5
- Installing Software 6
- Advanced Settings 13
- Web Admin Tool 13
- Adding Users 15
- Adding Groups 16
- Network Settings 17
- System Settings 20
- USB Hard Drives 21
- Formatting Hard Drives 22
- Mapping Additional Shares 23
- Maintenance 25
- Email Notication 26
- Backup Jobs 27
- Initialization 28
- Sleep Timer 31
- Print Server 32
- Time Machine 37
- DLNA Media Server 42
- Close when done 43
- BitTorrent Client 45
- Direct Copy 47
- Remote Access - WebAccess 48
- Using WebAccess 50
- Remote Access - FTP 53
- Mapping Multiple Shares 56
- Troubleshooting 57
- LED Information Codes: 58
- Fan Replacement 59
- Specications 60
- Factory Defaults 61
- Contact Information 62
- GPL Information 63
Resumo do Conteúdo
User ManualLS-XHL and LS-CHL LinkStation Pro and Live Models www.buffalotech.com35010807 ver.01 v2.2
10You can manually add LinkStation shares (folders) to your desktop by adding them to the Mac’s server list. Begin by clicking Go, and then choose Co
11Select Guest and click on Connect. Note: If you have congured share permissions on your LinkStation, select Registered User and enter your login
12If you don’t know your LinkStation’s IP address, there are several ways to get it.One simple method is to use the NAS Navigator client utility (incl
13Advanced SettingsTo open the Web Admin Tool, right-click on your LinkStation in NAS Navigator2 and choose Open Web Admin.Alternately, you could type
14Welcome to the Web Admin Tool! On the left side, you can see your LinkStation’s system information. Tabs and Submenus along the upper edge allow e
15To add users, select the Users/Groups tab. Local Users is the default submenu. Click on Create User. Adding UsersEnter your user information an
16To add a group, select the Local Groups submenu under the Users/Groups tab. Click on Create Group. Enter information for your group and click on
17Network SettingsNetwork Settings contains settings that affect your Ethernet connection. In most networks, LinkStation will get its IP Address auto
18To add the LinkStation to your workgroup or domain, click Modify Settings. Depending on your network type, you may choose to authenticate in Work
19Screens are different depending on whether you authenticate in Workgroup or NT Domain mode. Whichever mode you choose, enter the information needed
2IntroductionCongratulations on your new LinkStation! This user manual is intended to assist you in conguring it. Because we’re constantly updating
20In System Settings, you can modify the NetBIOS name of your LinkStation, date and time settings, and language settings. System Settings
21Add a USB hard drive to the LinkStation simply by plugging it in to USB port on the LinkStation. It will then appear in the master folder as a new
22Formatting of hard drives is done in the System/Storage area of the Web Admin Tool. To format hard drives, select the hard drive(s) that you want t
23Mapping Additional SharesYou can map additional drive letters to shares on your LinkStation. From NAS Navigator2, right-click on your LinkStation a
24From the Tools pull-down menu, select Map Network Drive. Choose a drive letter from the Drive: pull down menu. To specify the folder to map, eith
25The Maintenance submenu holds settings for Email notication. You can also restart the LinkStation from here. Maintenance
26If you have access to an SMTP mail server, your LinkStation can send you reports and alerts. To congure this, navigate to System/Maintenance, open
27To create a new backup job, click Create New Job in System/Backup/Backup Jobs Setup. Select the desired job schedule and properties and click Apply
28You can restore settings to their factory defaults by clicking Restore LinkStation. You can choose to either keep the current admin password after
29Initialization will affect different settings on the LinkStation depending on which method you use. Initializing the LinkStation from within the We
3Table of ContentsIntroduction Diagrams and Layout 4 Power Switch 5 Installing Software 6Using your LinkStation Using your LinkStat
30An Uninteruptable Power Supply may be attached to the LinkStation’s USB port. Once attached, you may congure it from System/Power Management/UPS S
31The LinkStation can be congured to go into power-saving (“sleep”) mode at regular intervals. In Power Management/SleepTimer, click Modify Settings
32• To share a USB printer with the LinkStation, navigate to Extensions/PrintServer in the Web Admin Tool and Enable print server functionality. Conn
33• Right-click on the lp icon and select Connect. • You will receive a warning that the server does not have the proper drivers. Click OK to conti
34• If lp is the only printer installed on the PC, then it will automatically be set as the default printer. If it’s not the only printer, you may ma
35• Click Print Test Page to print a sample page. You can also browse through the available settings for the printer. Please refer to the printer’s
36If a corrupt print job is sent to a printer, printing may suddenly fail. If your print jobs seem to be locked up, clearing the print queue may reso
37Time MachineTo use the LinkStation as a location for backups from a Mac running Time Machine, begin by creating a folder for the backups. In Shared
38Navigate to Extensions/Time Machine and click Modify Settings. Enable Time Machine. For the Target Folder, choose the folder you created for the ba
39The name for the Target Host Name eld can be found just under the Computer Name on the Sharing page in System Preferences. It is circled in red in
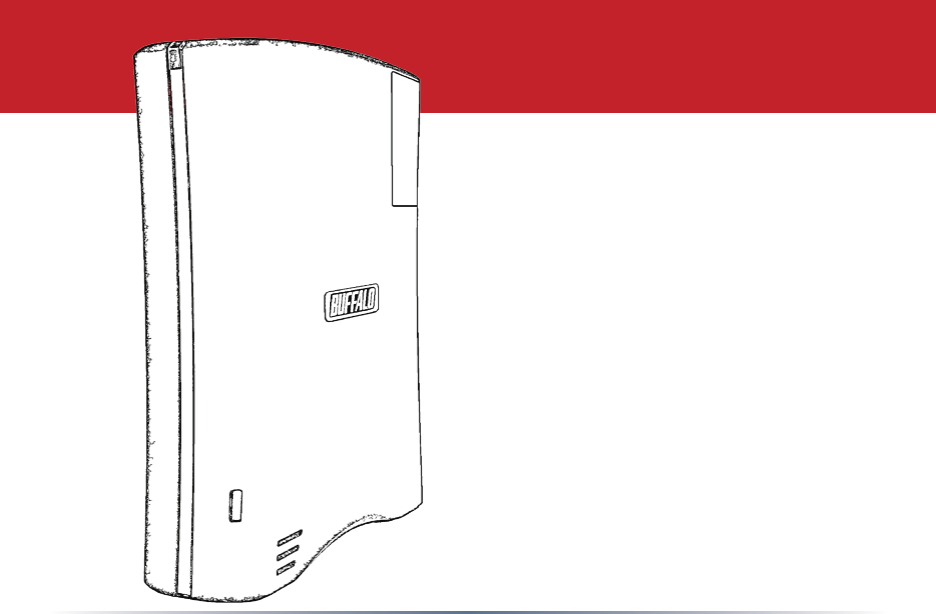
4Front Panel LayoutLayoutUSBPower Mode SwitchPower PlugEthernet(to Router)AUTOONOFFFunction ButtonStatus LED Replaceable Fan
40It will take several minutes for the image le to be created. The le TargetHostName_TargetMACAddress.sparsebundle is being created in the backup f
41Open Time Machine. Click on Choose Backup Disk.Choose your LinkStation from the list and click Use for Backup. In 120 seconds, Time Machine will b
42A share on the LinkStation can be streamed to DLNA compatible media players on your network. To congure DLNA media streaming, click on Modify Sett
43Clicking Authorized DLNA Media Clients opens this screen, where you can see all of the available media players on your network. Click Close when do
44Your LinkStation includes iTunes server capability. The iTunes server will be available as long as a share is enabled in the LinkStation’s DLNA med
45LinkStation’s built-in BitTorrent client will download les for you. To enable it, select Enabled. Chose a target folder for downloaded les to go
46To add a torrent, select either Add Torrent From File or Add Torrent From URL, and then Browse. Navigate to the torrent le and open it. Click Add
47You can copy digital media les directly to the LinkStation from a USB storage device, such as a digital camera, USB ash drive, or external hard di
48With Buffalo’s WebAccess, you can access your LinkStation from anywhere in the world with an Internet connection. It’s easy to access your les, or
49To enable WebAccess for a share, click on the sharename from Extensions/WebAccess. Choose your desired level of Web Access from the ‘Web Access Sett
5Power SwitchPowerModeAUTOONOFFThe “Power Mode” switch on the back of the unit has three positions: “Auto”, “On”, and “Off”. The “Auto” position aut
50To access your LinkStation remotely, open a browser window on any computer connected to the Internet and go to www.buffalonas.com. In the dialog bo
51To access individual folders on the right, click on their open links.Clicking on individual les will give you other options, depending on the lety
52To upload les to the TeraStation, click Upload in the bottom left corner of the window. Note: This option will only appear if you are logged in a
53The LinkStation includes FTP server capability, allowing you to access les on it from anywhere. If FTP is enabled for a folder, then you can read,
54To access your LinkStation remotely, type ftp://username:password@ipaddress/share into a web browser whereusername - is your usernamepassword - is y
55Troubleshooting Multiple SharesWhen accessing multiple shares from a Windows PC, you may see this error message. This is caused by having multiple
56Mapping Multiple SharesWhen mapping any share, select the Connect using a different user name option. A login and password prompt will appear. Use
57Disk ErrorsIf LinkStation encounters a disk error, it will be reported in the LinkStation status on the top of any of the Web-Based conguration scr
58LED Information Codes:The status LED will ash amber to give information codes. Like the error codes, these alternate between ashing for 1 second
59Unplug the connector by pulling it straight up. Replacement fans for the LinkStation are available from Buffalo Technology. The part name is “OP-FA
6Installing SoftwareInsert the Link Navigator CD into your computer’s CD/DVD drive. On a PC, the setup wizard will launch automatically. Select your p
60Mac and Mac OS are trademarks of Apple Inc., registered in the U.S. and other countries. Windows is a registered trademark of Microsoft Corporation
61Administrator Name: admin (cannot be changed)Password: passwordDefault Shared Folder: share Recycle Bin: enabled for shareDHCP Client: Automat
62Buffalo Technology USA Inc.11100 Metric Blvd, Suite 750Austin, TX 78758GENERAL INQUIRIES Monday through Friday 8:30am-5:30pm CSTDirect: 512-794-8
63Source code for Buffalo products that use GPL code is available at http://opensource.buffalo.jp.GPL Information (North America)GPL Information
7After installation, you’ll have a new shortcut to Buffalo NAS Navigator on your desktop. Click it to open the NAS Navigator2 client utility.Using yo
8Using your LinkStation with a MacUsing your LinkStation with a MacAfter installing the LinkNavigator software, your Mac will have “NASNavigator” in t
9Using your LinkStation with a MacIn NAS Navigator2, choose Congure from the drop-down menu to get to the Web page. Click Open Web Page to go the W
Mais documentos para Servidores NAS e de armazenamento Buffalo LinkStation Live

Manuais e produtos relacionados com Servidores NAS e de armazenamento Buffalo LinkStation Live
 (157 páginas)
© 2020, manymanuals-pt.com. Todos os direitos reservados. | 0.055 s |
 Manymanuals.com
 Manymanuals.de
 Manymanuals.fr
 Manymanuals.it
 Manymanuals.pl
 Manymanuals.cz
 Manymanuals.es
 Manymanuals-pt.com
Comentários a estes Manuais